# NEXUS Testnet II 节点教程(WEB\&CLI\&Mobile)
### Nexus Layer 1
Nexus Layer 1 是一台行星级超级计算机,旨在承载全球商业。Nexus Layer 1 正在建设中,旨在成为一个行星级的区块链超级计算机:
* 将全球计算能力集中到一条链上
* 随着每个新节点水平扩展
* 使用 Nexus zkVM 垂直扩展
* 创建所有计算的统一证明:Proof Singularity
### **Nexus 测试网 II**
对于 Testnet II,Nexus Layer 1 是与 Nexus Network 的 Orchestrator 集成的概念验证。
编排器通过 RPC 端点调用第 1 层来奖励节点所获得的\*NEX 积分\*。
#### **测试网特点**
* EVM 兼容性:与以太坊工具和标准完全兼容。
* 新的 Nexus 操作系统:贡献计算能力,赚取 NEX 积分,并攀升排行榜。
* 电子邮件和钱包登录:使用您的电子邮件或钱包轻松登录。
* 简化的节点管理:将所有节点连接到一个 Nexus 帐户。
### Web网页赚取积分
浏览器访问:
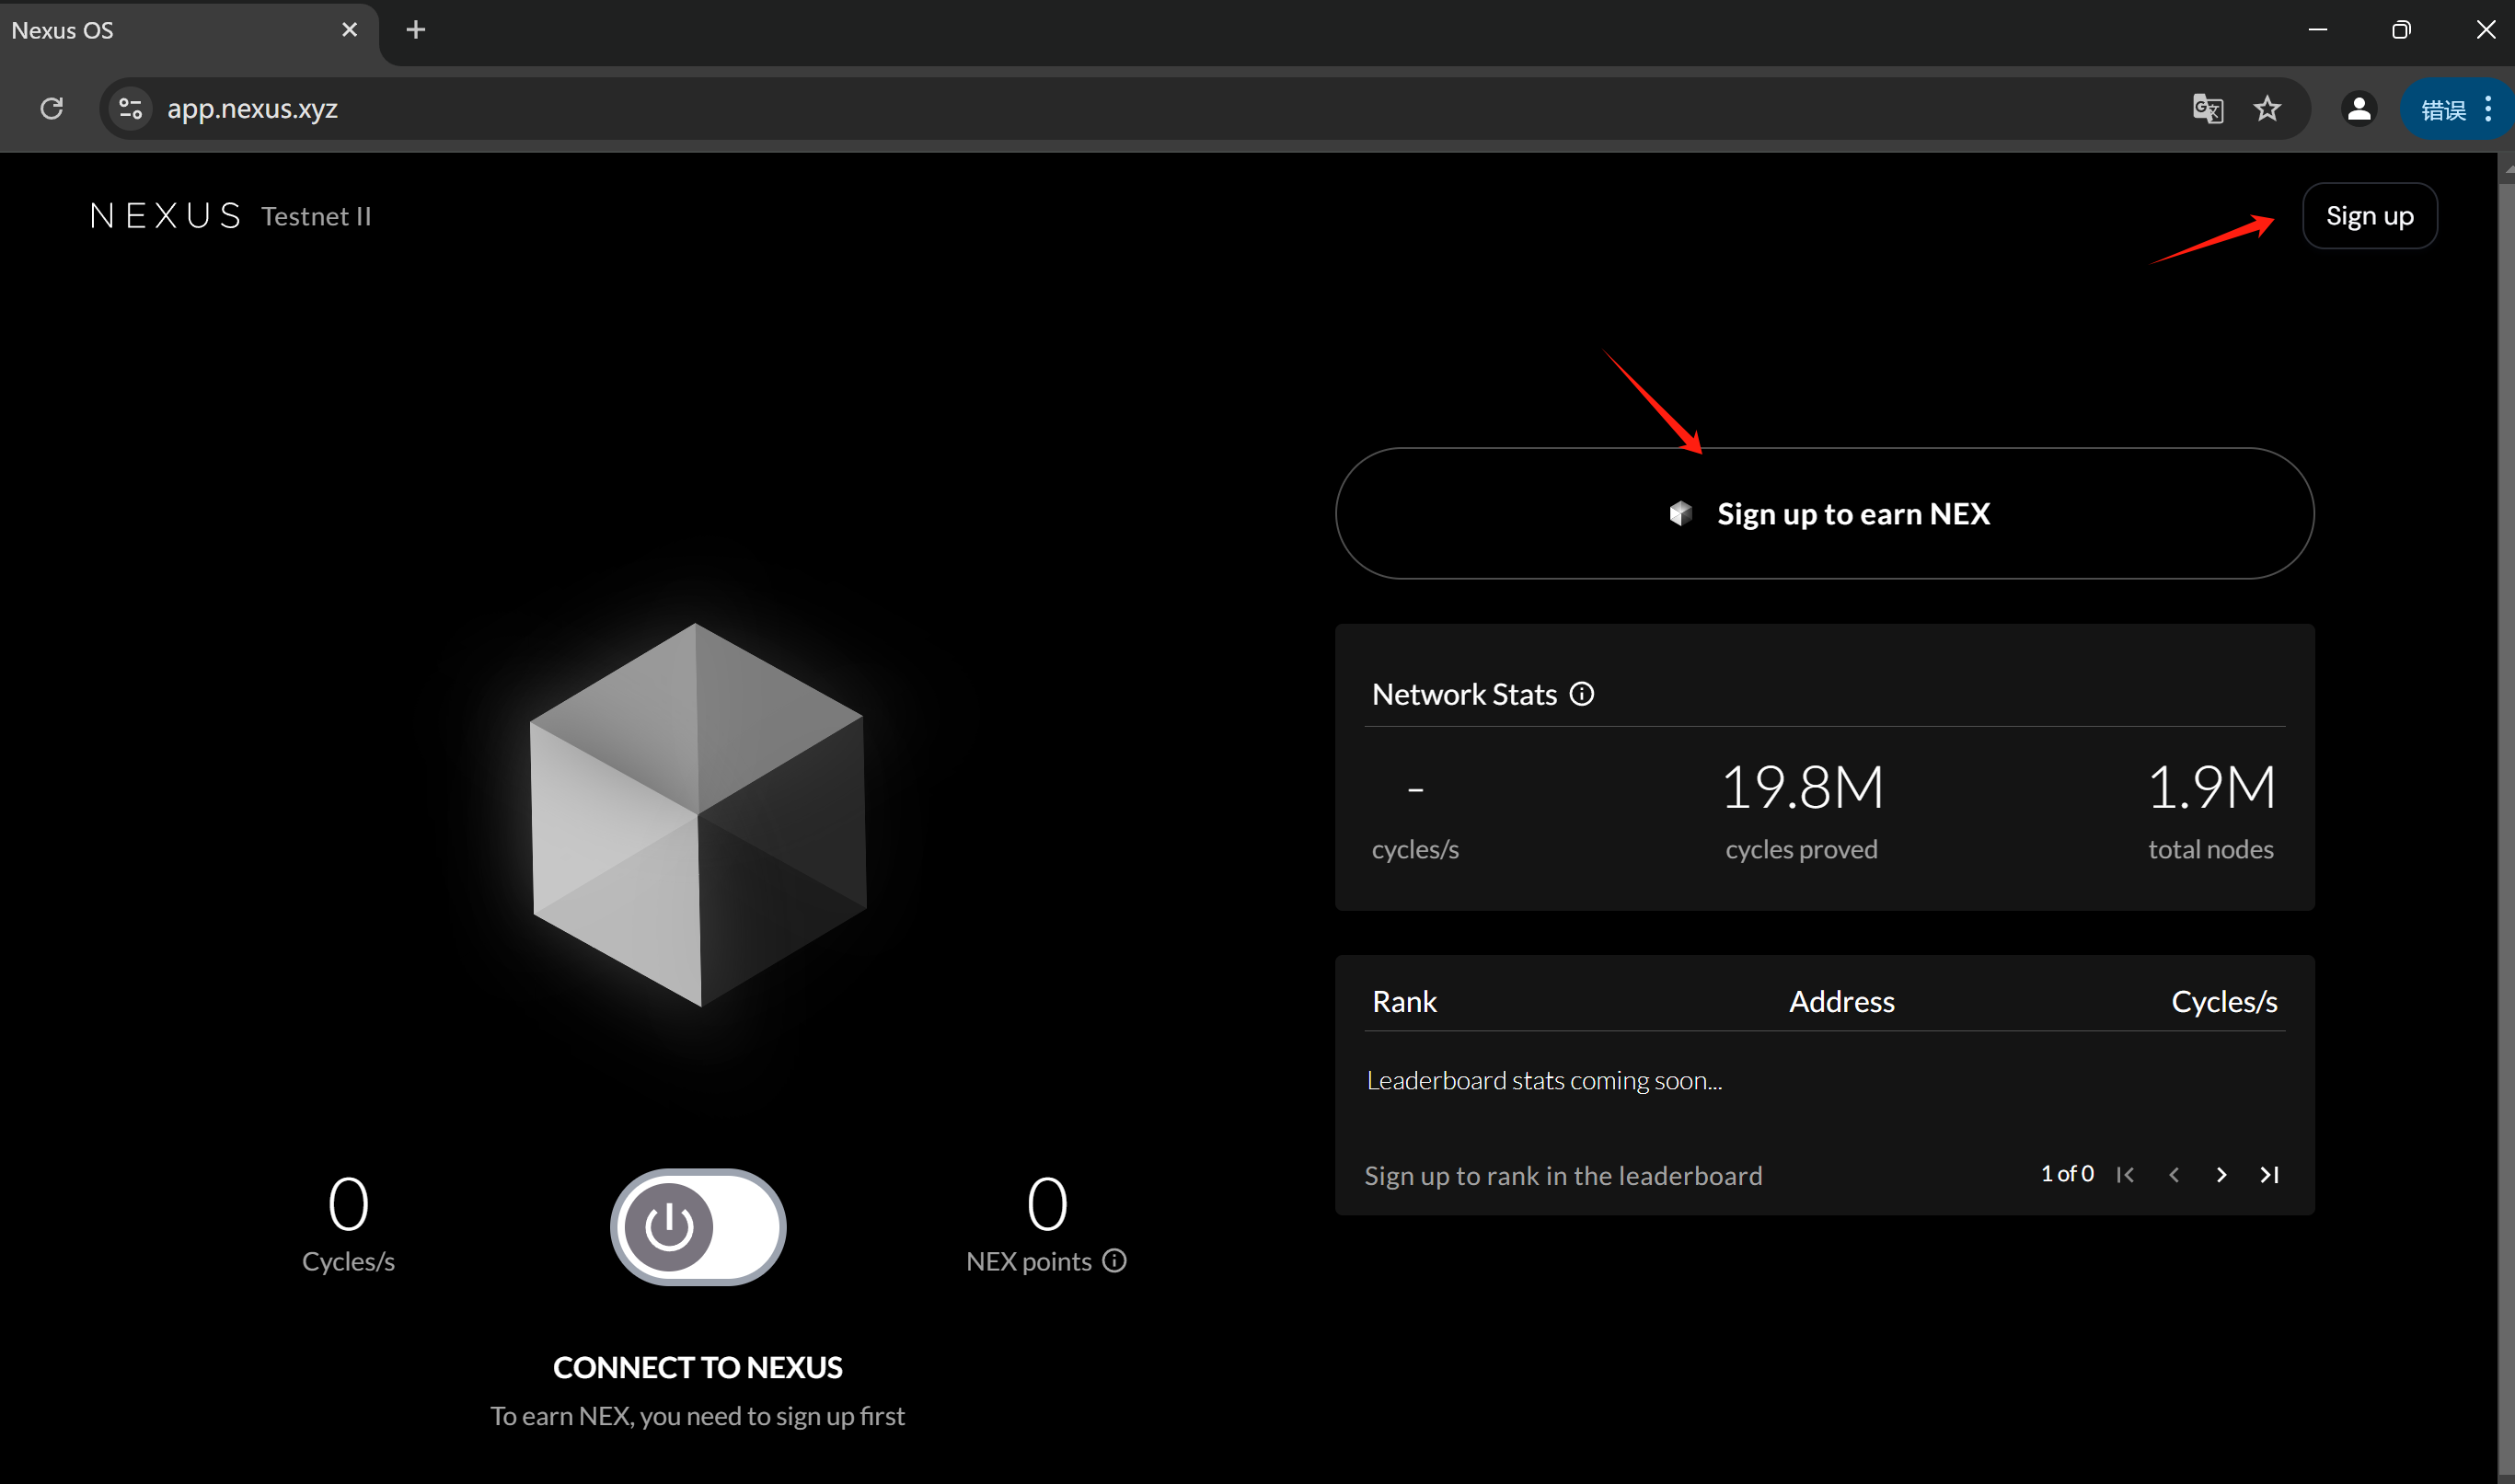 点击“Sign up”
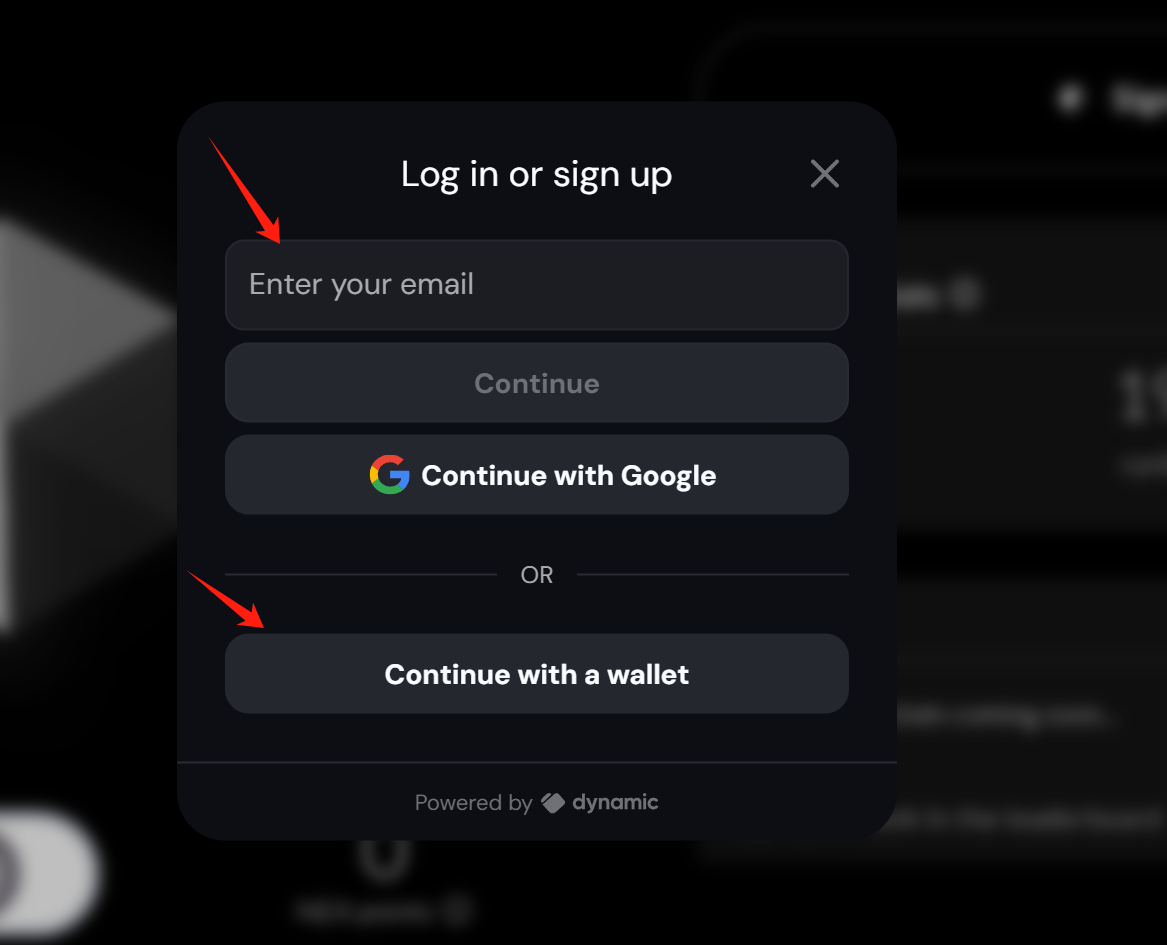 选择EVM钱包或邮箱注册,小编是先选择钱包授权注册第二步再补邮箱。
如果选择邮箱先注册的话,系统会自动生成一个钱包地址给你,如果想换成自己的钱包地址,需要在设置里面 “Link a new wallet” → “Select”
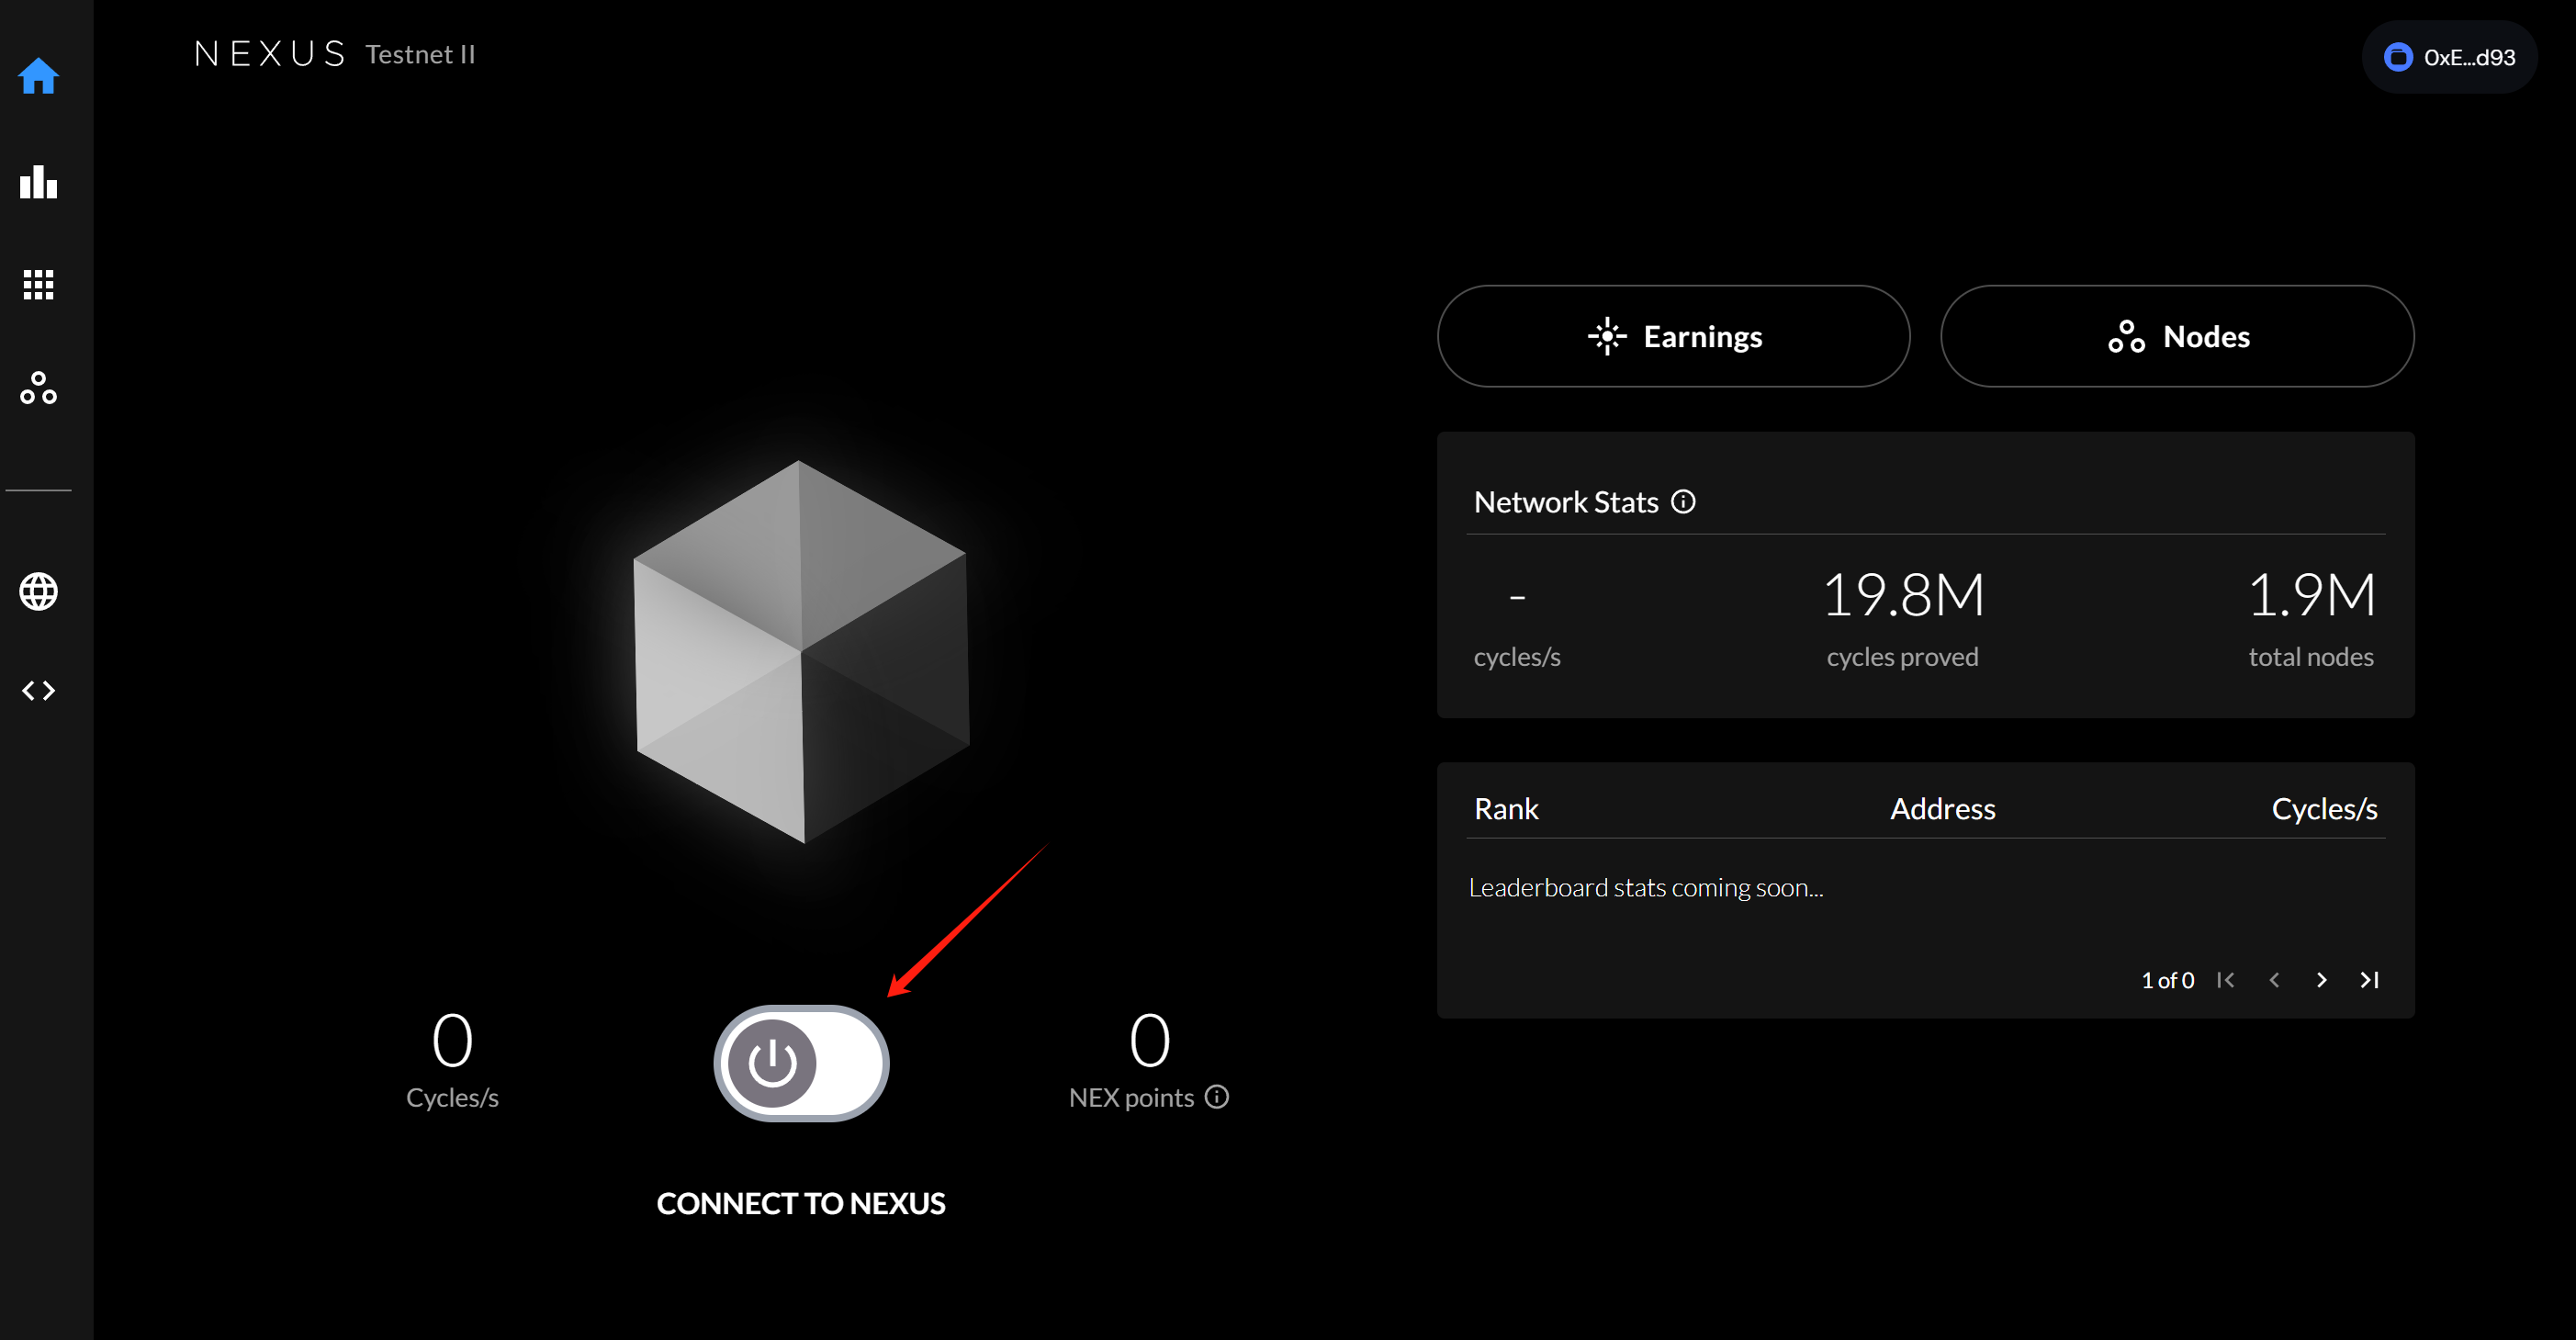
单击开关开始赚取 NEX 积分:
选择EVM钱包或邮箱注册,小编是先选择钱包授权注册第二步再补邮箱。
如果选择邮箱先注册的话,系统会自动生成一个钱包地址给你,如果想换成自己的钱包地址,需要在设置里面 “Link a new wallet” → “Select”
单击开关开始赚取 NEX 积分:
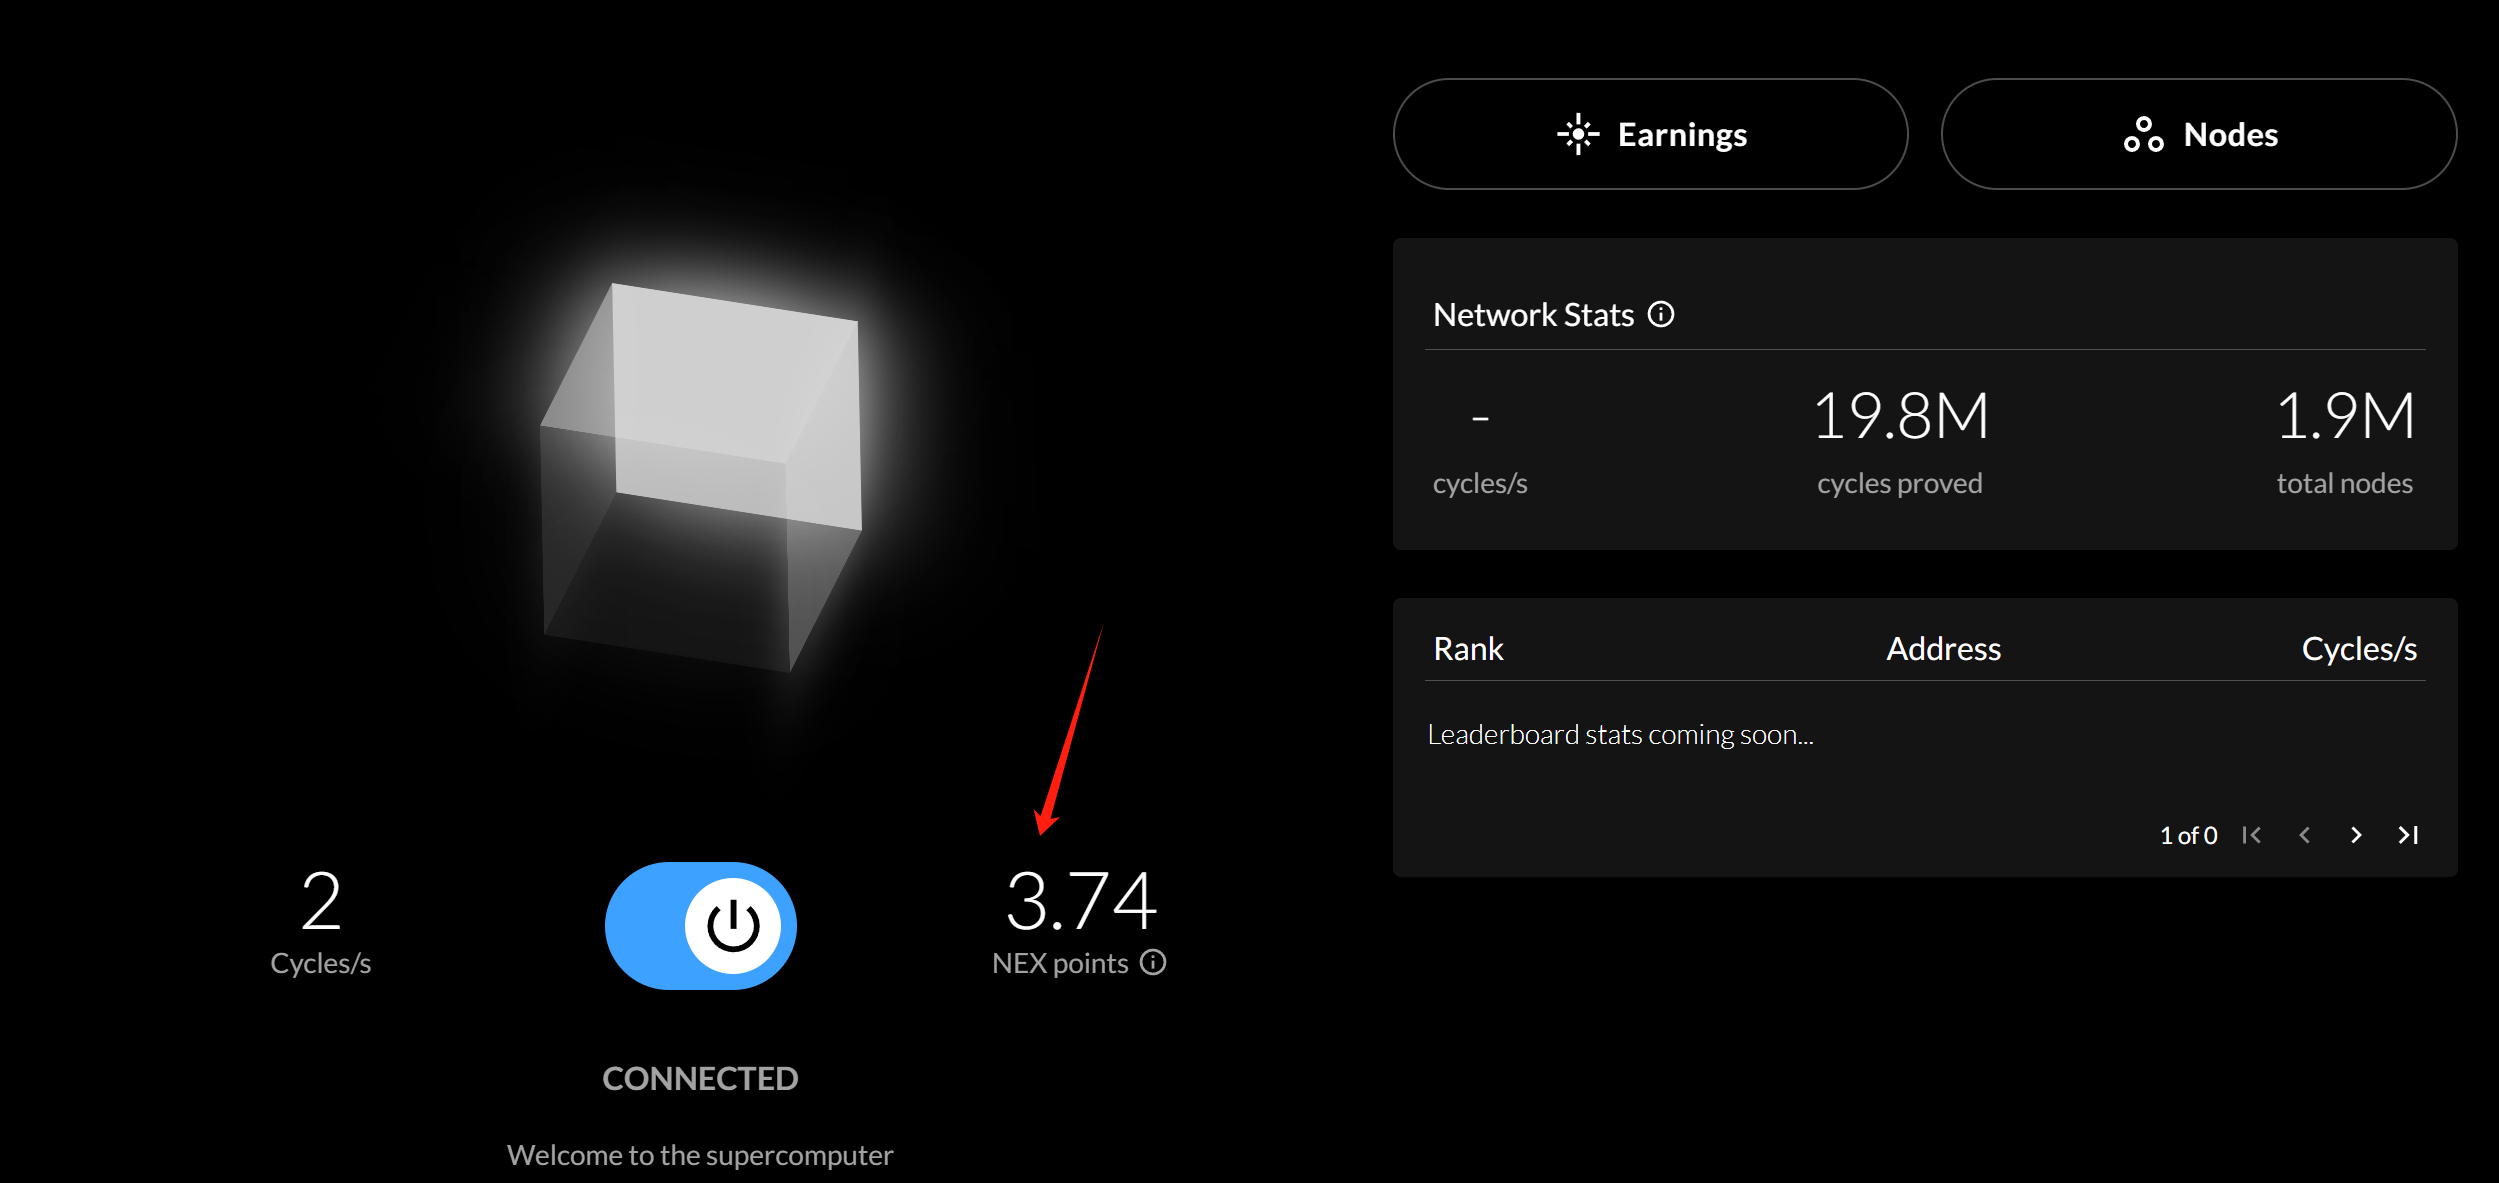
 然后开始计算积分:
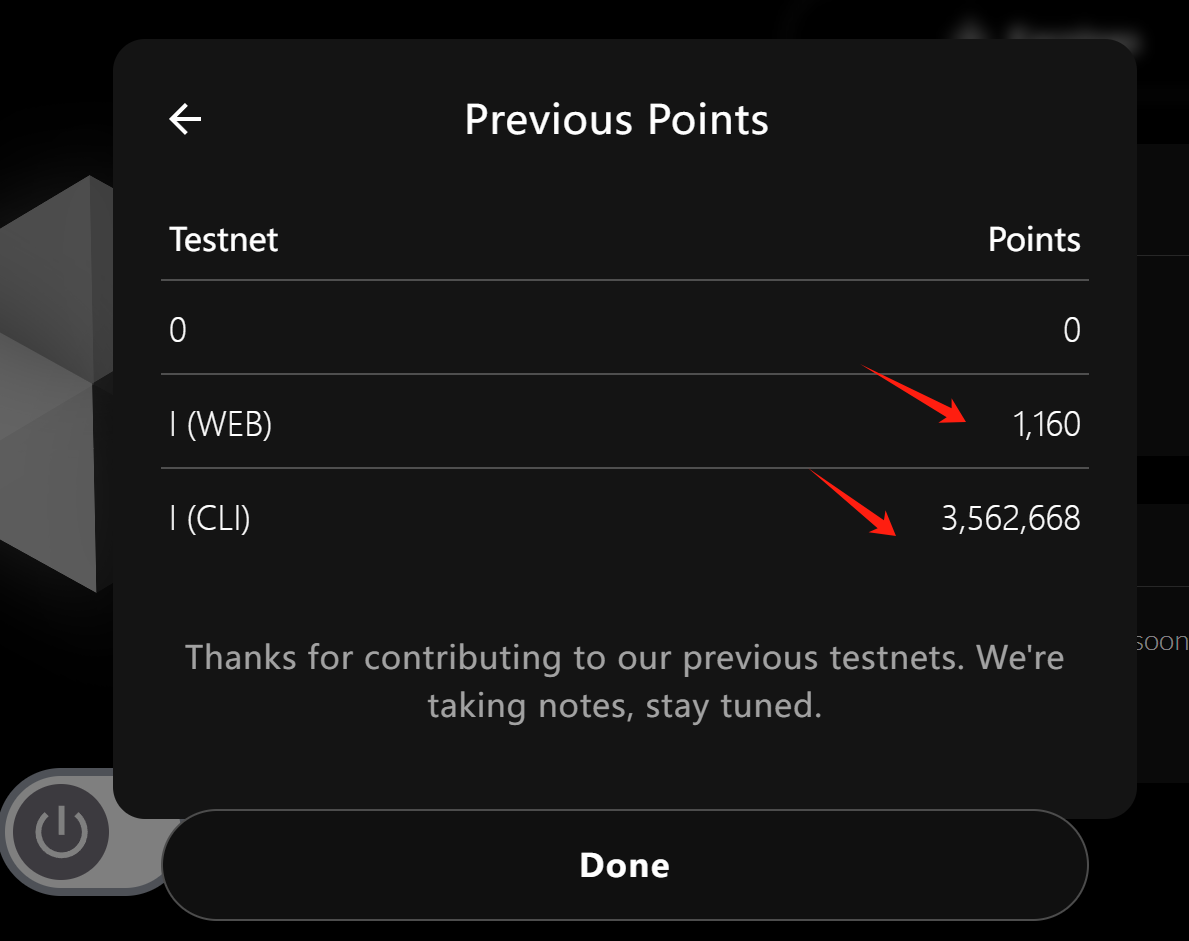
 点击“Earnings” → View Previous Points 同时可以看到过去第一期跑的测试积分:
 #### 自动连接脚本
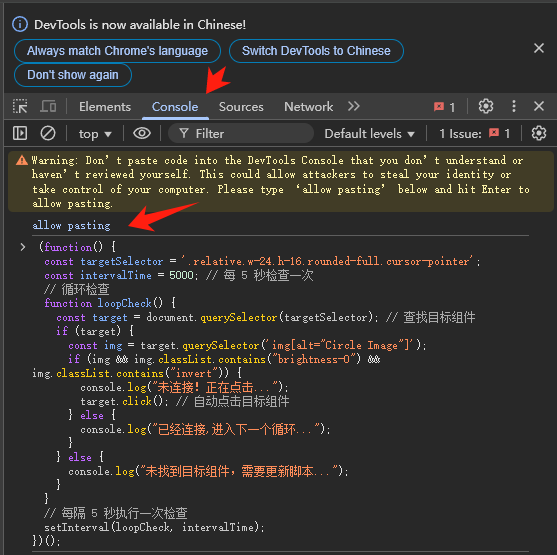
前期不稳定,连接断断续续,网页版本需要时不时去点击开关,下边的方法能实现网页自动连接:
右键 → 检查 → 打开Console控制台 → 粘贴脚本 -> Enter键执行
```
(function() {
const targetSelector = '.relative.w-24.h-16.rounded-full.cursor-pointer';
const intervalTime = 60000; // 每60秒检查一次
// 循环检查
function loopCheck() {
const target = document.querySelector(targetSelector); // 查找目标组件
if (target) {
const img = target.querySelector('img[alt="Circle Image"]');
if (img && img.classList.contains("brightness-0") && img.classList.contains("invert")) {
console.log("未连接!正在点击...");
target.click(); // 自动点击目标组件
} else {
console.log("已经连接,进入下一个循环...");
}
} else {
console.log("未找到目标组件,需要更新脚本...");
}
}
setInterval(loopCheck, intervalTime);
})();
```
如何粘贴脚本提示“Warning”,请输入“allow pasting”
#### 自动连接脚本
前期不稳定,连接断断续续,网页版本需要时不时去点击开关,下边的方法能实现网页自动连接:
右键 → 检查 → 打开Console控制台 → 粘贴脚本 -> Enter键执行
```
(function() {
const targetSelector = '.relative.w-24.h-16.rounded-full.cursor-pointer';
const intervalTime = 60000; // 每60秒检查一次
// 循环检查
function loopCheck() {
const target = document.querySelector(targetSelector); // 查找目标组件
if (target) {
const img = target.querySelector('img[alt="Circle Image"]');
if (img && img.classList.contains("brightness-0") && img.classList.contains("invert")) {
console.log("未连接!正在点击...");
target.click(); // 自动点击目标组件
} else {
console.log("已经连接,进入下一个循环...");
}
} else {
console.log("未找到目标组件,需要更新脚本...");
}
}
setInterval(loopCheck, intervalTime);
})();
```
如何粘贴脚本提示“Warning”,请输入“allow pasting”
 ### CLI 节点赚取积分
Nexus NetWork CLI 是一个用于向网络贡献计算资源的命令行工具。
#### MACOS 节点
前提条件:
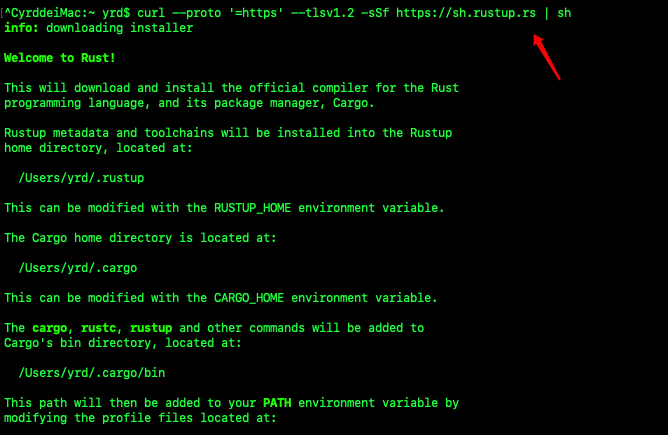
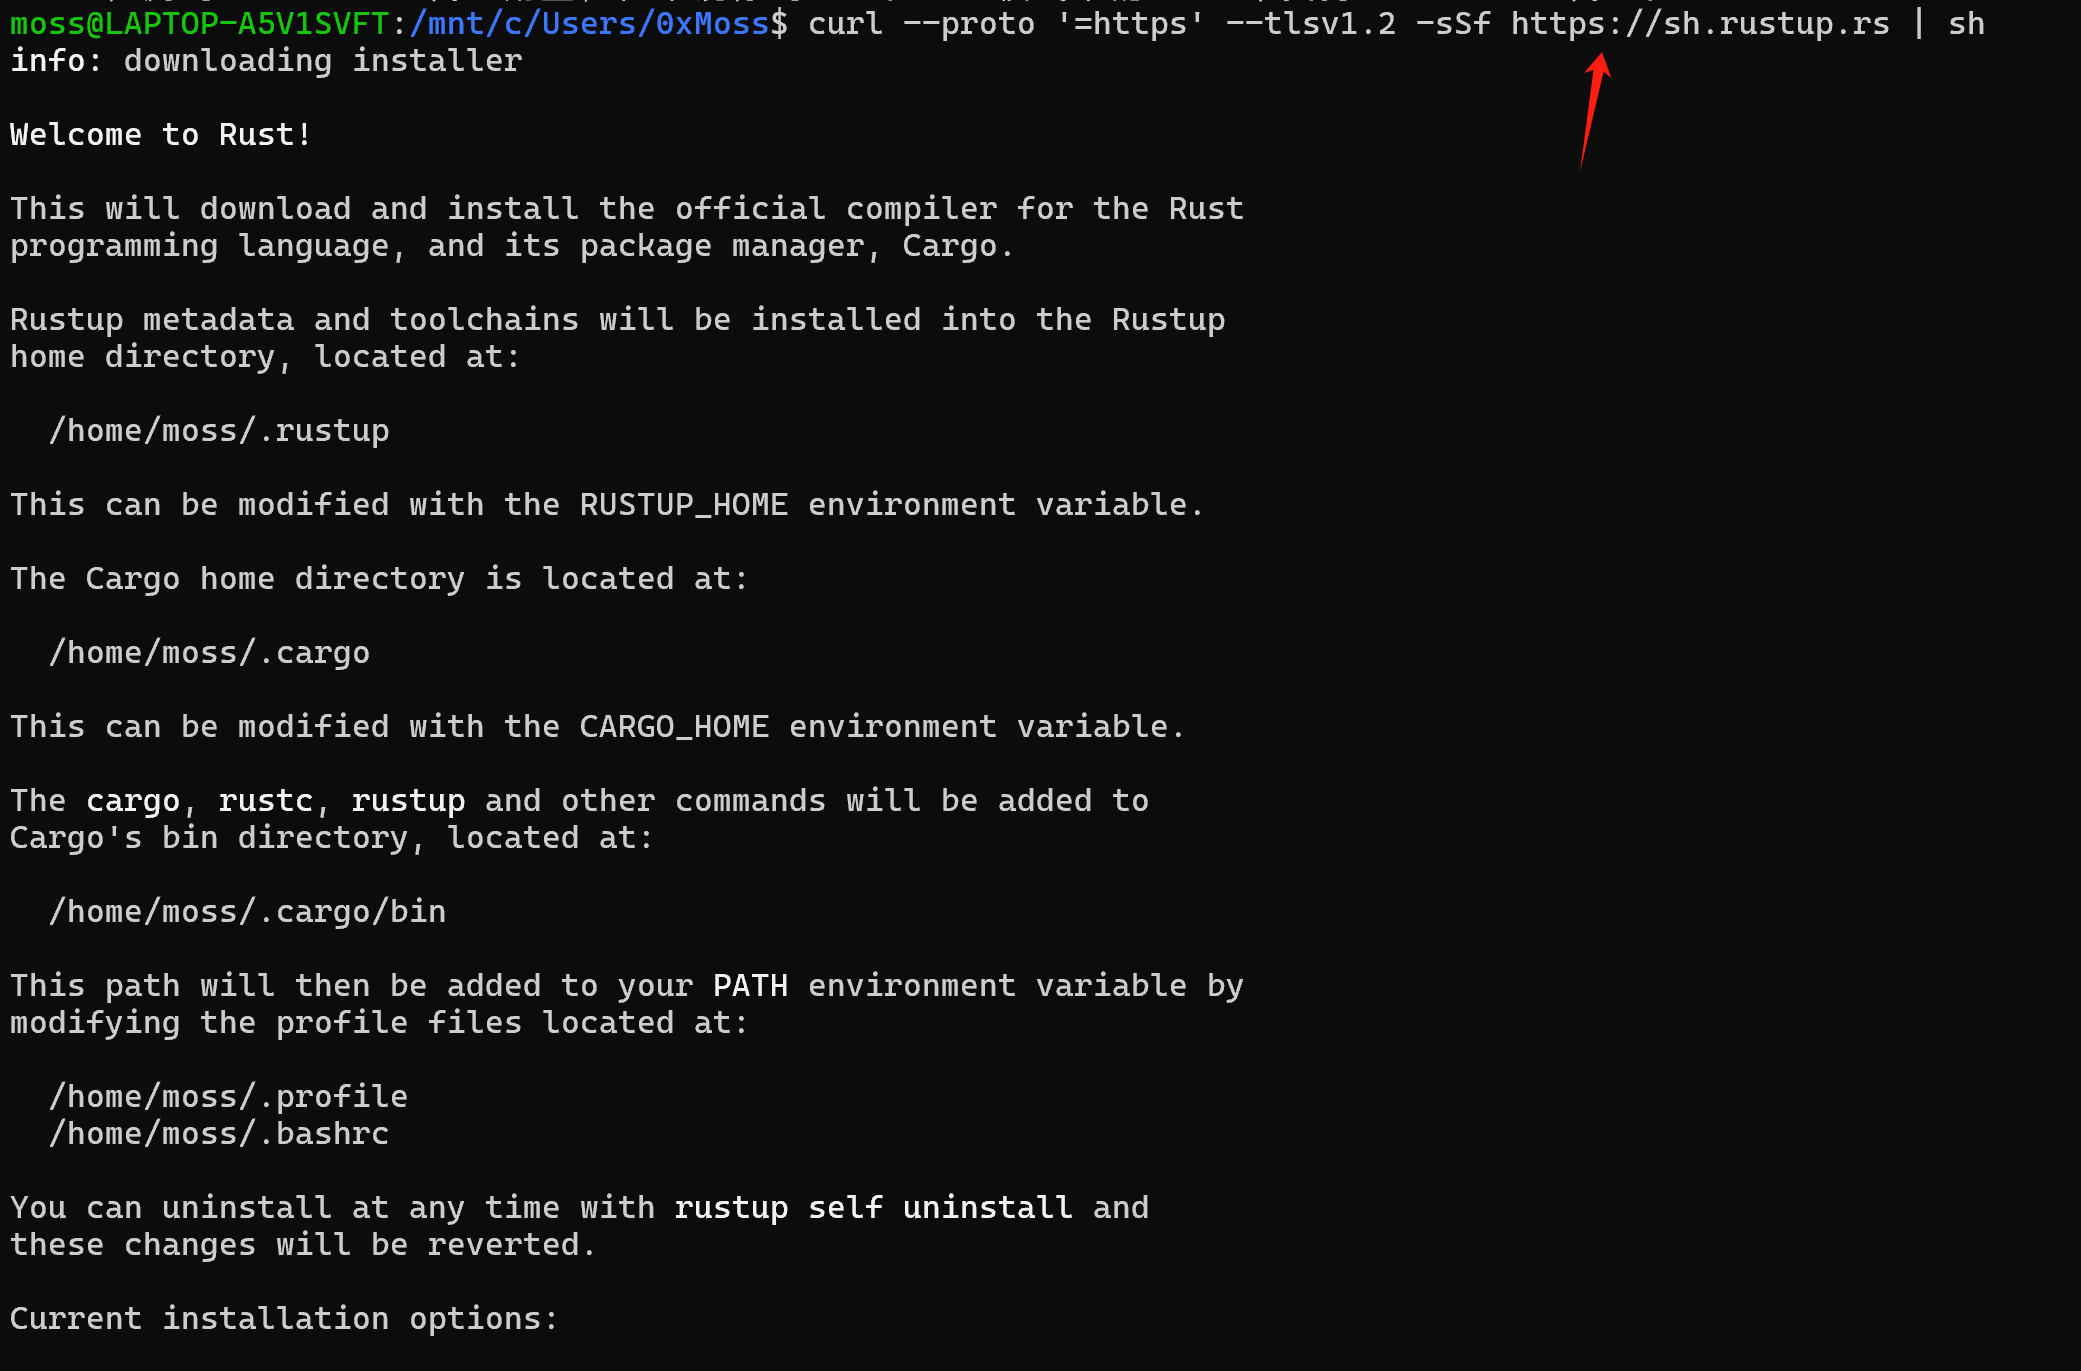
1. 安装Rust
```
curl --proto '=https' --tlsv1.2 -sSf https://sh.rustup.rs | sh
```
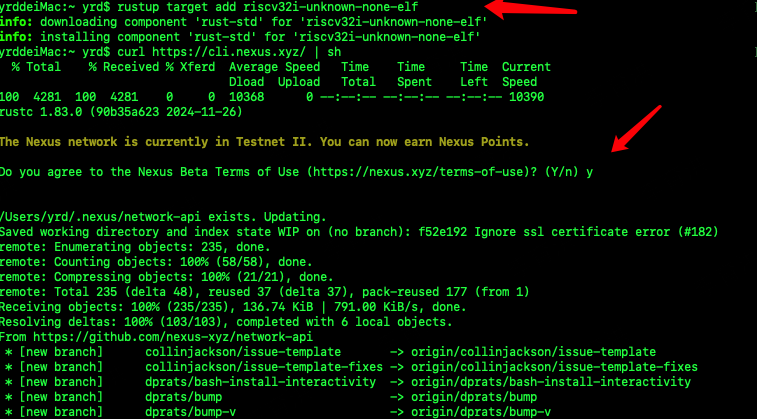
2. 添加`riscv32i`目标
```
rustup target add riscv32i-unknown-none-elf
```
### CLI 节点赚取积分
Nexus NetWork CLI 是一个用于向网络贡献计算资源的命令行工具。
#### MACOS 节点
前提条件:
1. 安装Rust
```
curl --proto '=https' --tlsv1.2 -sSf https://sh.rustup.rs | sh
```
2. 添加`riscv32i`目标
```
rustup target add riscv32i-unknown-none-elf
```
 安装脚本(重启节点也是这个脚本):
```
curl https://cli.nexus.xyz/ | sh
#权限不够需要加sudo
sudo curl https://cli.nexus.xyz/ | sh
```
安装脚本(重启节点也是这个脚本):
```
curl https://cli.nexus.xyz/ | sh
#权限不够需要加sudo
sudo curl https://cli.nexus.xyz/ | sh
```
 输入 Node ID
 *如果启动失败的话,过后多尝试连接,因为是刚启动的测试网络,还不太稳定。*
**如何查找”Node ID” ?**
*如果启动失败的话,过后多尝试连接,因为是刚启动的测试网络,还不太稳定。*
**如何查找”Node ID” ?**
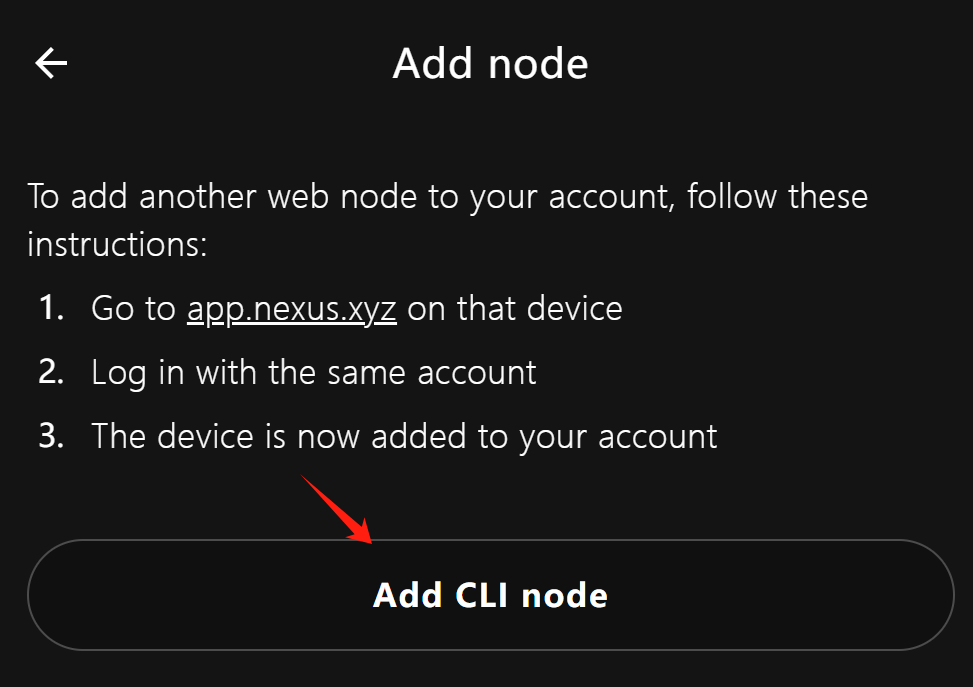
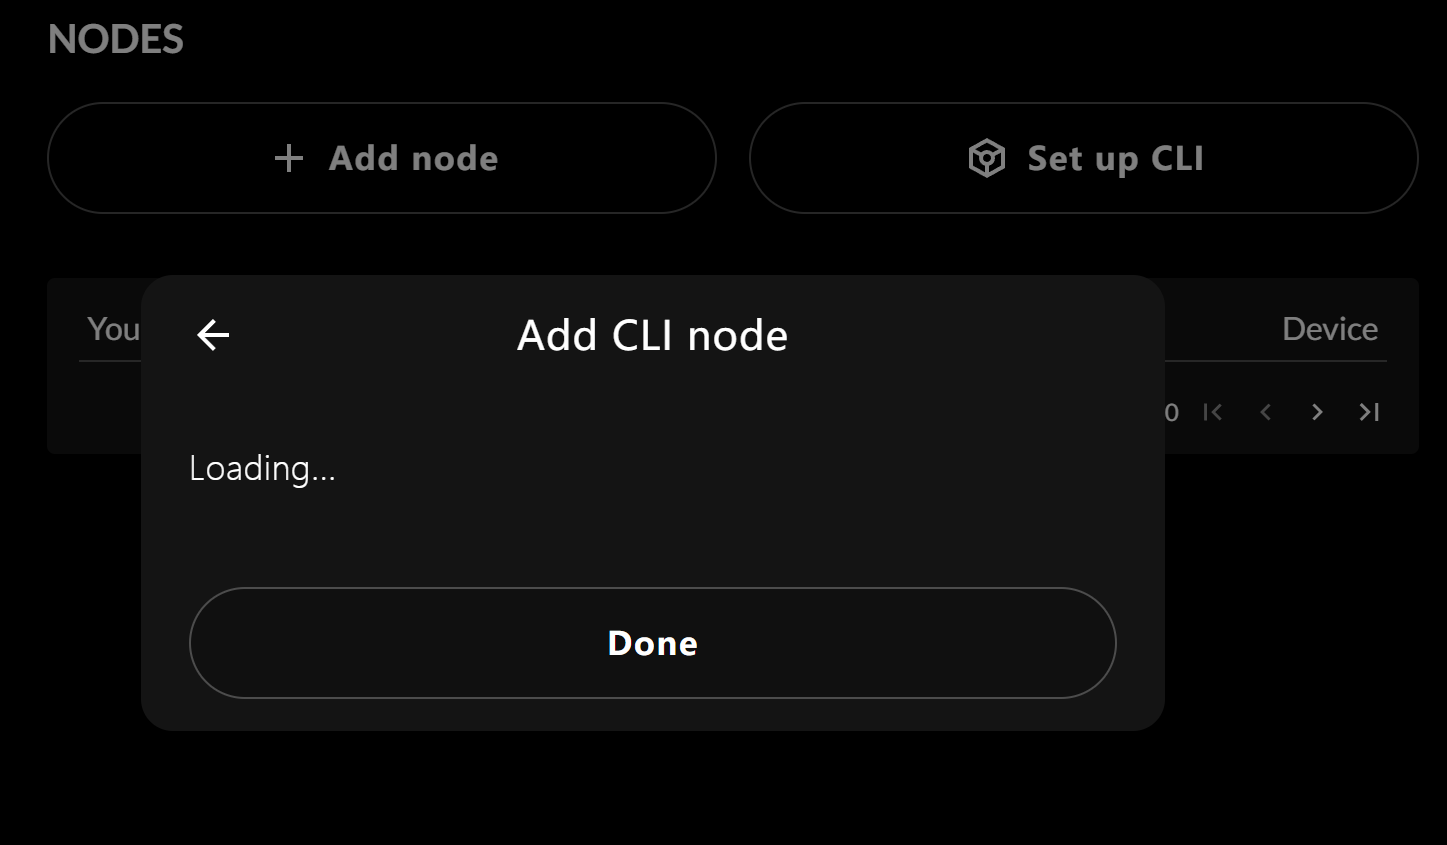
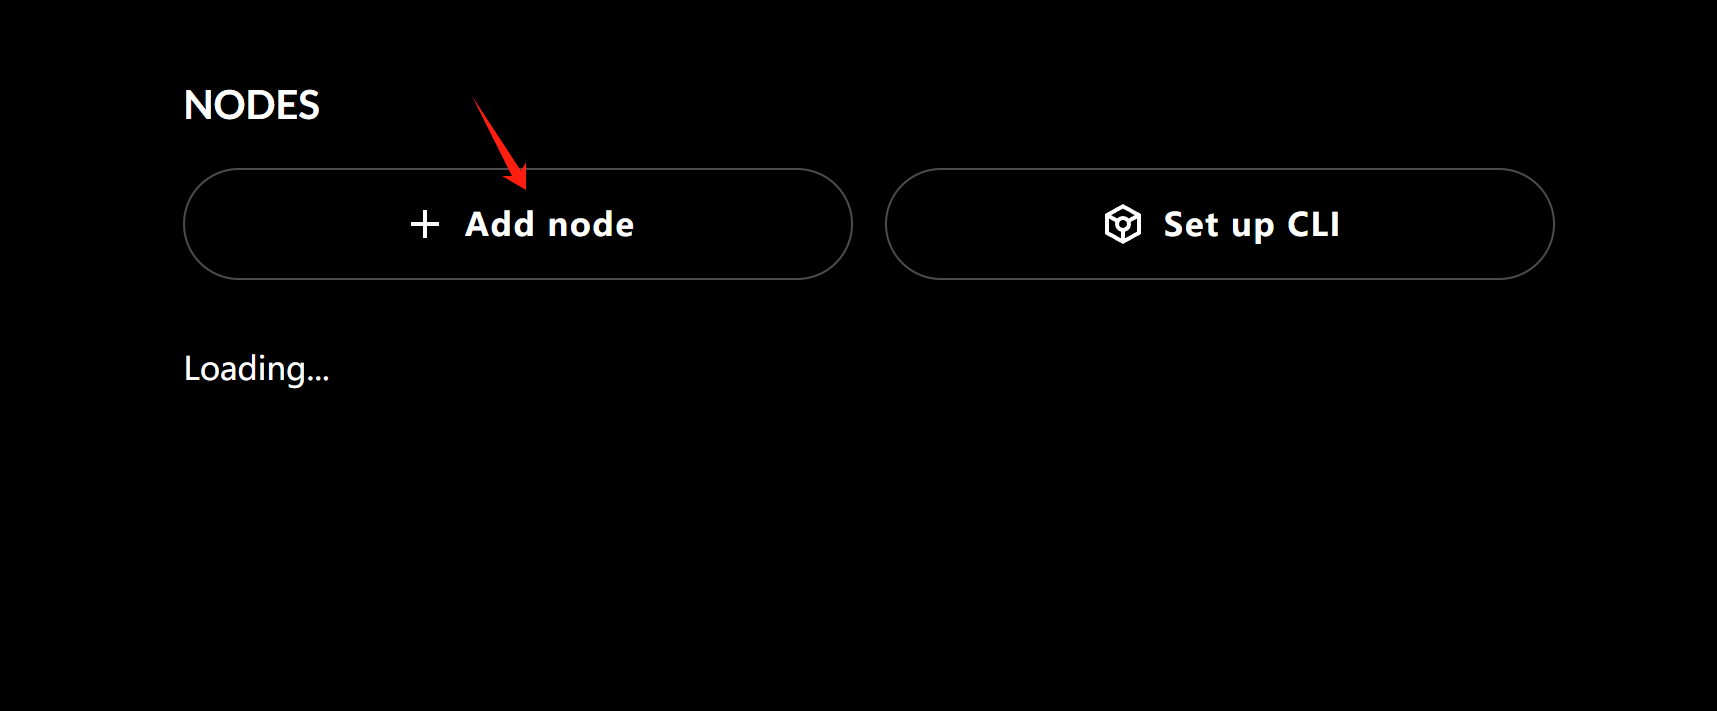 “Add CLI node“
 生成Node ID
 复制Node ID
* 复制形如”XXXXX”的ID
* 若显示DEFAULT1,请刷新页面重新生成
* 目前系统还不稳定,ID有可能刷不出来,后续多尝试
复制Node ID
* 复制形如”XXXXX”的ID
* 若显示DEFAULT1,请刷新页面重新生成
* 目前系统还不稳定,ID有可能刷不出来,后续多尝试
 *CLI 节点前期问题多多,后续还会更新此教程,请及时刷新查看*。
### Linux 节点
启动流程和Macos基本一样,也需要安装 **Rust** 和添加 **riscv32i**
*CLI 节点前期问题多多,后续还会更新此教程,请及时刷新查看*。
### Linux 节点
启动流程和Macos基本一样,也需要安装 **Rust** 和添加 **riscv32i**
 安装脚本(也是启动脚本):
```
curl https://cli.nexus.xyz/ | sh
```
安装脚本(也是启动脚本):
```
curl https://cli.nexus.xyz/ | sh
```
 启动成功如下图:
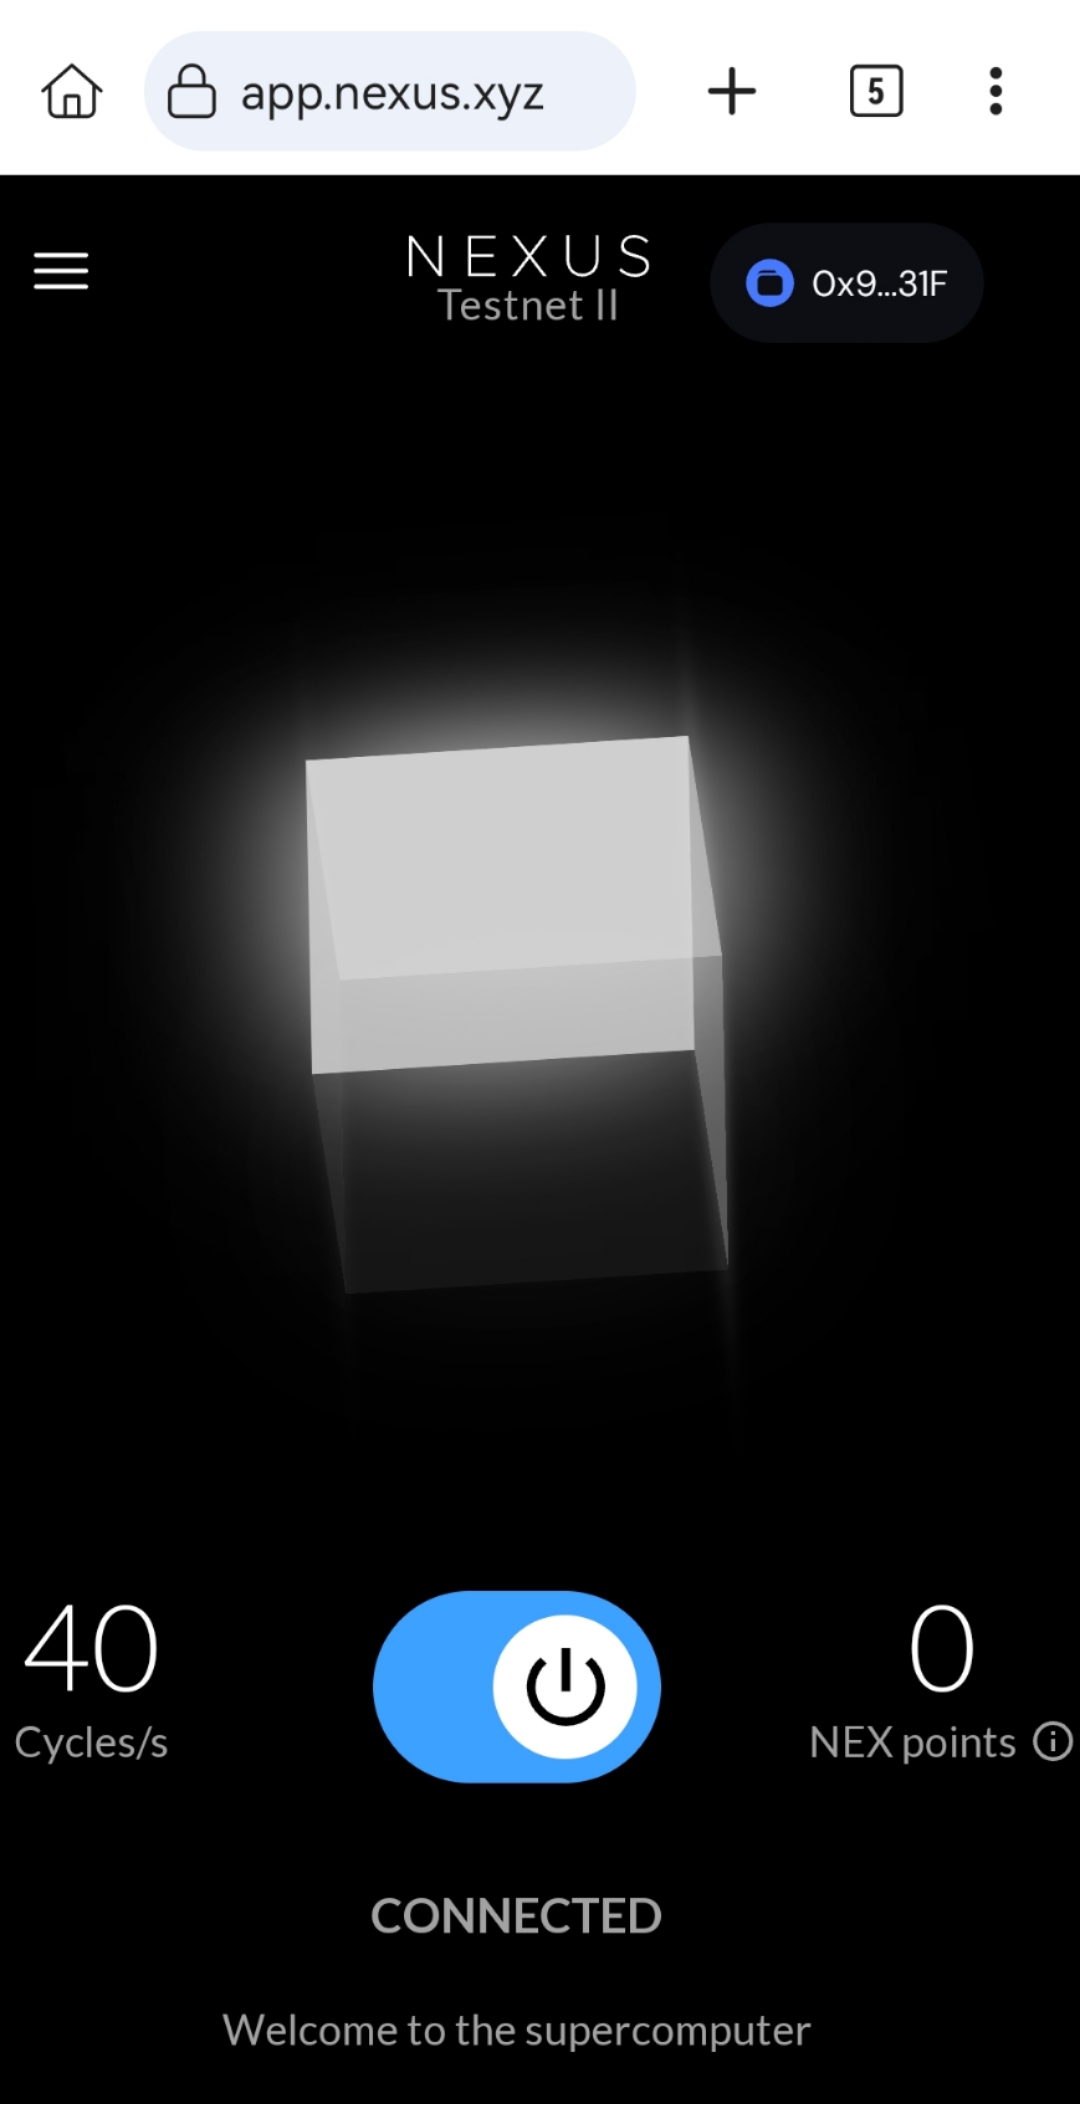
 ### 手机端节点
方式1: 可以通过Okx App 打开链接“app.nexus.xyz” 通过web3钱包链接登录。
方式2:手机浏览器直接打开链接“app.nexus.xyz” 通过邮箱登录。
### 手机端节点
方式1: 可以通过Okx App 打开链接“app.nexus.xyz” 通过web3钱包链接登录。
方式2:手机浏览器直接打开链接“app.nexus.xyz” 通过邮箱登录。
 ### 常见问题
1. *可以一个账号添加多个节点。*
2. *Nexus Testnet II 网络目前处于测试网阶段,可能不稳定,连接会断断续续。*
### **结语**
*觉得有用的,记得关注我的推特哦,这里将会持续整理Depin挂机/AI项目/测试网交互/主网交互/节点挖矿等详细教程~*
[*https://x.com/MossmindAi*](https://x.com/MossmindAi)
### 常见问题
1. *可以一个账号添加多个节点。*
2. *Nexus Testnet II 网络目前处于测试网阶段,可能不稳定,连接会断断续续。*
### **结语**
*觉得有用的,记得关注我的推特哦,这里将会持续整理Depin挂机/AI项目/测试网交互/主网交互/节点挖矿等详细教程~*
[*https://x.com/MossmindAi*](https://x.com/MossmindAi)